Friends, today I have another Hot Air Balloon card to share with you. If you missed the others, you can find them here:
This bundle was released in January - but the stamps and dies have happily carried over to the new Annual Catalogue. So they'll be with us for at least another year, hooray!
Here's today's card:
To make this card, I started by stamping the large balloon from the Hot Air Balloon Stamp Set onto Basic White Cardstock in Bubble Bath Ink. I added the sentiment right onto the balloon in Azure Afternoon Ink, then used that ink to also stamp a basket.
Next, I die cut:
- the balloon and basket using the Hot Air Balloon Dies
- a large circle from Azure Afternoon Cardstock, using the Stylish Shapes Dies
- a cloud from Vellum Cardstock, using the Bright Skies Dies
I also embossed the right side of a 3 3/4" x 5" Basic White Cardstock panel. I used the Stripes & Splatters Embossing Folders that are now retired. However, any folder of your choice would work.
Here's the Hot Air Balloon Stamp Set and Dies:
To assemble, I first adhered the embossed Basic White panel to a 4" x 5 1/4" Lemon Lolly Cardstock panel. Using Stampin' Dimensionals™, I secured the panels to a 5 1/2" x 8 1/2" Bubble Bath Cardstock card base.
I added a 1 1/2" x 5" strip of Lighter Than Air DSP to the left side of the embossed panel. While this paper has recently retired, the equally colourful Bright & Beautiful DSP - which uses many of the same tones - would make an excellent substitute:
To make the central balloon element, I used Stampin' Dimensionals™ to add the balloon to the circle. I adhered the basket below the balloon with a Mini Stampin' Dimensional™.
I added a bow made from the now-retired Sheer Ribbon Combo, securing with a Mini Glue Dot™. (A great substitute ribbon would be the new Pretty in Pink Bordered Ribbon.) Then I attached the circle to the card base with Stampin' Dimensionals™.
To finish the card, I tucked the cloud under the circle with a Mini Glue Dot™, then embellished with Rainbow Adhesive-Backed Dots.
I hope you enjoyed my project today, friends! Don't miss my Special Offers below - including the incredible joining offer on just for the month of May! (No selling required!)
Shop with me
Special Offers
Best. Deal. Ever!
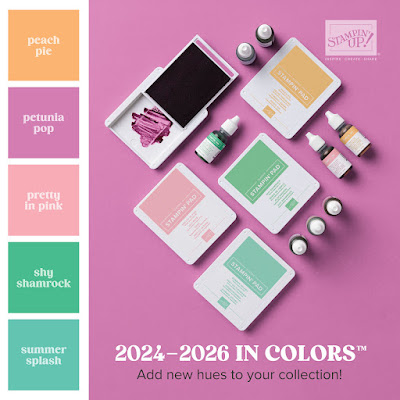
Join Stampin’ Up!®️ in May for $135 and get an additional $140+ of items FREE! Includes a stack of 5 NEW In Color™ ink pads & other items for FREE. No selling required!
Join Stampin’ Up!®️ in May for $135 and get an additional $140+ of items FREE! Includes a stack of 5 NEW In Color™ ink pads & other items for FREE. No selling required!
NEW Sampler Club - $30/month
How fun would it be to get a sampling of different Stampin' Up!®️ goodies in the mail every month? That's exactly what my NEW Sampler Club offers - for just $30!
In Color Club
Collect the new In Color items without breaking the bank! You’ll receive an ink pad, Stampin’ Blends, cardstock and DSP in one colour each month for 5 months.
Don't miss the latest news! My newsletter includes my latest card designs, plus promotions & stamping news. Unsubscribe anytime.
Click Photo to Purchase in my Online Store:


No comments:
Post a Comment
How lovely of you to take the time to write a comment. Thank you - merci - woliwon!