Friends, we had a fabulous weekend on beautiful Campobello Island. It was warm enough to be summer! Here's gorgeous Friar's Bay Beach at low tide, where we found multitudes of sand dollars:
With the advent of summery weather, I've got a card for you that spotlights one of my favourite seasonal fruits - cherries! The card features the Sweetest Cherries Stamp Set and Cherry Builder Punch.
I'll include a clickable photo supply list at the end of this post. Just click on the item to see it in my online store.
To make this card, I started by using Blending Brushes and Artistic Mix Decorative Masks. I used washi to secure a 4 1/4" x 5 1/2" Basic White Cardstock panel onto my Grid Paper. I used more washi to adhere my chosen mask over it, being careful to line everything up within the grid lines.
I inked my Blending Brush in my Pecan Pie Ink Pad and tapped it off on my grid paper to remove excess ink. Using a circular motion, and starting just off the edge of my mask, I blended ink onto my panel with a fairly light hand. I continued until the whole panel was covered.
These Artistic Mix Decorative Masks are a carry-over product from the previous catalogues, and I think they have been a bit overlooked. So I'm glad to highlight how they can be used to make fabulous patterned backgrounds to match any inks and colour scheme! They're also just $13.75 for 5 masks, so a budget-friendly choice:
Next came die cutting. I used the middle-sized scalloped rectangle from Scalloped Contours Dies to cut a Basic White Cardstock rectangle.
Using the terrific Sweetest Cherries Stamp Set, I arranged my two chosen sentiment pieces on my acrylic stamp block. Then I stamped them on the right side of the scalloped rectangle in Pecan Pie Ink.
Helpful Hint: Ink them up very well to ensure the word "sweet" is covered. Should there be a few light or white spots in the word, simply fill them in with Pecan Pie Stampin' Blends (dark). Here's the stamp set:
Onto scraps of Basic White Cardstock, I stamped two cherries in Poppy Parade Ink, two leaves in Granny Apple Green Ink, and two stems in Pecan Pie Ink.
After stamping each image, I used the Cherry Builder Punch to cut it out. This punch can also be used without the stamp set, to punch out cherries from coloured cardstock.
To assemble, I first cut my blended panel to 3 3/4" x 5". I adhered it to a 4" x 5 1/4" Pecan Pie Cardstock panel.
With Stampin' Dimensionals™, I added the stamped scalloped rectangle. Then I used Multipurpose Liquid Glue to create the cherries. I layered them onto the panel using Mini Glue Dots™ and Stampin' Dimensionals™.
To finish the card, I added the panels to a 4 1/4" x 11" Basic White Thick Cardstock card base with Stampin' Dimensionals™. Then I embellished with Adhesive-Backed Solid Gems.
Thanks so much for stopping by, friends!
Don't miss my Online Classes, available across Canada. Registrations for June/July close May 21st! Find out more here.
And do check out my Special Offers below - I'd love to have you become part of our cross-Canada crafting community!
🛍 Shop with me in May & receive FREE pieces to make this card!
Special Offers
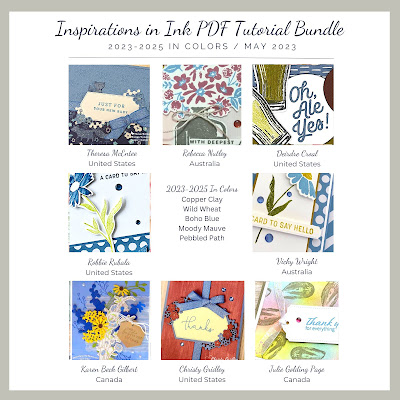
🎁 Shop with me in May & receive a FREE tutorial bundle featuring the New In Colors™!

Collect ALL the new colours - without breaking the bank!
Click here to sign up for Colour Club
No selling required. You don’t even have to buy anything else, ever!
Join our happy crafting community that stretches across the country, from southern Alberta to northern Labrador - and get 20% off future purchases!


No comments:
Post a Comment
How lovely of you to take the time to write a comment. Thank you - merci - woliwon!