Warm greetings from Saint Stephen, New Brunswick, Canada! I'm located just across the tidal Skutik (St Croix) River from Calais, Maine, USA. This beautiful area is just off the Bay of Fundy, home of the world's highest tides. It's the traditional territory and home of the Passamaquoddy, and I'm grateful they share it with us.
Thanks for joining us on our blog hop across the Stampin' Up!® world. Contributors are all members of the fantastic Demonstrator Training Program organized by Kylie & Bruno Bertucci in Australia. Thanks so much for everything, Kylie & Bruno!

We've created these cards to say thank you to our lovely customers. Just click on the Blog Hop Links at the end of this post to see more cards.
My May card uses a combo of returning items from previous catalogues and brand new items from our 2023-2024 Annual Catalogue, just released a couple of weeks ago. I'll include a clickable photo supply list for you at the end of this post.
To make this card, I started with die cutting. Using the super-versatile Stylish Shapes Dies, I cut the 2nd largest circle from Garden Green Cardstock, the 3rd largest circle from Gold Foil Sheets, and the 4th largest circle from Basic White Cardstock.
My next step was stamping and colouring. Here's what I did:
- I used Garden Green Ink to stamp my sentiment from the Hello, Ladybug stamp set onto the white circle.
- Then I stamped the ladybug in Tuxedo Black Memento Ink onto a scrap of Basic White Cardstock. I coloured it with Lemon Lolly Stampin' Blends (dark).
- Finally, I stamped the daisy repeatedly and randomly in Wild Wheat Ink across (and off the edges) of a 3 3/4" x 5" Wild Wheat Cardstock panel.
To assemble, I attached a 1 1/2" x 5" strip of Fresh as a Daisy DSP to a 2" x 5" strip of Lemon Lolly Cardstock. I adhered them to the stamped daisy panel, then added that panel to a 4" x 5 1/4" panel of Garden Green Cardstock. I attached all these panels to a 4 1/4" x 11" Basic White Thick Cardstock card base with Stampin' Dimensionals™.
To finish the card, I cut out the ladybug with Paper Snips scissors, then layered on the 3 circles and ladybug. I used Stampin' Dimensionals™ to pop up the ladybug. As a final touch, I embellished with Pastel Adhesive-Backed Sequins.
I hope you enjoyed this project - and that it will inspire you to combine old & new items in a single card!
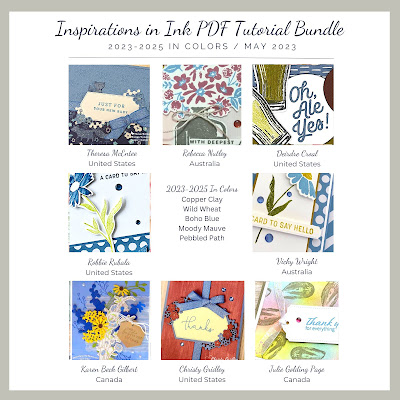
If you're in Canada and don't already have a demonstrator, I'd love to assist with your order. As thanks, I'll send you the pieces to make the above card plus my May tutorial bundle featuring the 5 new In Colors™. Do check out my Special Offers below, and enjoy hopping around the Stampin' Up!® world!
Blog Hop Links
🛍 Shop the New Catalogue with me now
Special Offers
Here's a sneak peek of the Beautiful Balloons Class.
🌈 Sign up for a Colour ClubCollect ALL the new colours - without breaking the bank!
Click here to sign up for Colour Club
Bookmark includes samples of ALL the new colours!
No selling required. You don’t even have to buy anything else, ever!
Join our happy crafting community that stretches across the country, from southern Alberta to northern Labrador - and get 20% off future purchases!
Click here to find out more
Receive FREE pre-cut paper pieces for a card as my thanks! (Canadian addresses only)
💻 Follow my blog:
Click the button below so you won't miss a single card!

Click Photo to Purchase in my Online Store:


Cute card!
ReplyDeleteLook at that cute ladybug with all the flowers. So cute.
ReplyDeleteSuch a cute card. Thanks for sharing.
ReplyDeleteOh such a cute ladybug card!
ReplyDeleteCutest card ever!!! Love this.
ReplyDeleteSo cute!
ReplyDeleteLove this card! Thank you Julie for taking part in our Demonstrator Training Blog Hop this month.
ReplyDeleteCute card Julie. Thanks for sharing.
ReplyDeleteFun card! Love the circle treatment you used.
ReplyDelete