Friends, today's a big day, with the start of the Last Chance Sale! Two catalogues are retiring soon, with discounts on items up to 60%. Included is a list of 15 colours that are saying goodbye.
I'm also offering a FREE card class by mail, when you order with me OR sign up for an online class by April 6th. Check out my Special Offers below to get the most for your money!
My card today is part of my series featuring the Sweet Citrus Bundle. Click below to see any cards you missed:
Here's today's card:
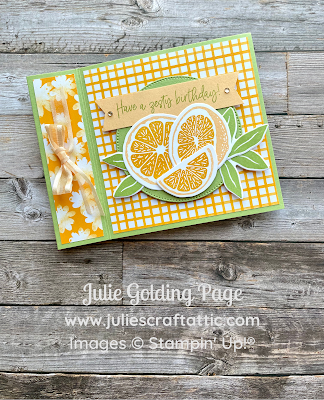
My orange-themed card features all retiring products, except for the Sweet Citrus stamp set & dies. However, the bundle price (with a savings of $7.75) expires May 1st. I'll include a photo supply list for you at the end of this post. Just click on the item to open it in my online store.
This card's colour palette is made up of three retiring colours: Pale Papaya, Mango Melody & Pear Pizzazz. Ink pads, cardstock, markers, ribbons, and more are now available in the Last Chance Sale. Get your favourites before they disappear!
To make the card, I started by stamping the citrus fruit outlines from the Sweet Citrus Stamp Set onto a Basic White Cardstock panel in Pale Papaya Ink, using Clear Block E for the large stamp. Then I stamped the inside of the fruit in Mango Melody and also added 3 sets of leaves in Pear Pizzazz Ink. I finished by stamping my sentiment in Pear Pizzazz Ink onto a 3/4" x 3.5" scrap of Pale Papaya Cardstock, cutting chevron shapes in both ends.
Next came die cutting. I used the Sweet Citrus Dies to cut out the fruit and leaves. Then I used the largest circle in Stylish Shapes Dies to cut out a circle from Pear Pizzazz Cardstock.
Here's a look at the terrific Sweet Citrus Bundle, which includes a Hybrid Embossing Folder. The dies will work in the Mini Stampin' Cut & Emboss Machine - but you'll need the standard-sized machine for the embossing folder.
This card employs a bookbinding fold - which is actually very easy to construct. I simply cut an 8 1/2" x 11" piece of Pear Pizzazz Cardstock in half lengthwise, to 4 1/4" x 11". Then I scored it at 5 1/2" and 4 1/4". I folded the card in half on the 5 1/2" score line, then bent back the front of the card toward me at the 4 1/4" line. I opened the card and applied Tear & Tape Adhesive to the inside of the 1 1/4" x 4 1/4" scored area and adhered it to the interior of the card (the 4 1/4" x 5 1/2" part of the card with no score lines).
Next, I adhered a 1" x 4" strip and a 4" square of Rain or Shine Specialty DSP to the front of the card. This retiring paper has wonderful colours and is super-cute:
To finish the assembly, I layered on my circle, stamped, label, oranges, and leaves, popping pieces up as desired. Then I tied a bow in Pale Papaya Open Weave Ribbon, securing it with a Mini Glue Dot, and I embellished with Champagne Rhinestone Basic Jewels.🛒 Shop the Last Chance Sale - Up to 60% Off
When you shop with me using host code UYR4BQM7, I'll gift you my:
- FREE card class (special promo just until April 6 - more info below!)
- card of the month
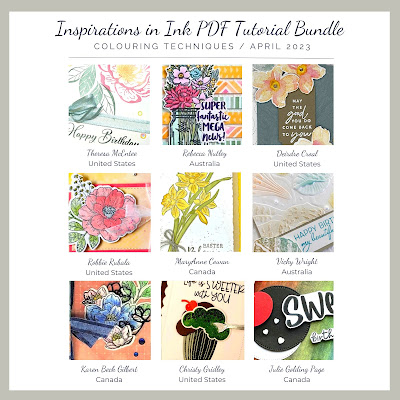
- international tutorial bundle
Click here to shop now!
Special Offers
🎁 Want a FREE Card Class?
Receive a FREE 3-card class by mail when you:
- Shop with me using Host Code UYR4BQM7
- OR sign up for an Online Class
- by April 6
- FREE tutorial bundle featuring Colouring Techniques
- FREE card of the month
Available anywhere in Canada! Click on the photo for more info on these current classes:
Receive FREE pre-cut paper pieces for a card as my thanks! (Canadian addresses only)
💻 Follow my blog:
Click the button below so you won't miss a single card!

Supply List - Click to Purchase


No comments:
Post a Comment
How lovely of you to take the time to write a comment. Thank you - merci - woliwon!