Friends, we're just back from a fabulous 29th anniversary trip! We spent the weekend in New Hampshire's White Mountains, doing a bit of hiking, taking the cog railway to the summit of Mount Washington, and enjoying the resort town of North Conway.
On Sunday, we visited a huge craft & artisan fair in North Conway. It was 30 C / 86 F, with full sun, and humid. Fortunately, one of the vendors was making fresh limeade. So incredibly refreshing!
And so today's card is inspired by my experience of an early summer day and delicious limeade.I chose a summery palette of Lemon Lime Twist, Melon Mambo, and Pretty Peacock. Featured on the card are the Sweet Citrus Stamp Set and Dies. (The dies are called Sweet Citrus Hybrid Embossing Folder, as they come with the folder also.)
I'll include a clickable photo supply list at the end of this post.
To make this card, I started by stamping the outlines of the limes onto Basic White Cardstock, using Granny Apple Green Ink and the Sweet Citrus Stamp Set. Then I stamped the interior portions of the limes in Lemon Lime Twist. (Hint: make sure that all 3 lime interiors are inside the lines of the Granny Apple Green outlines before lowering your stamp.)
Onto a 3/4" x 4" scrap of Lemon Lime Twist Cardstock, I stamped the sentiment in Melon Mambo Ink. I also cut both ends of the sentiment at an angle.
Here's a look at the Sweet Citrus Stamp Set, accompanying dies, and embossing folder. (Please note: The embossing folder requires the standard-sized Stampin' Cut & Emboss Machine.)
Next, I did my die cutting. I first cut the cardstock that the limes were stamped on, so that it would fit in my Mini Stampin' Cut & Emboss Machine. Then I cut out the limes with the Sweet Citrus dies. I also used Tailor Made Tags Dies to cut the largest tag (the one from either set will work) out of Basic White Cardstock.
To assemble the card, I started with a 5 1/2" x 8 1/2" Pretty Peacock Cardstock card base, adhering a 3 3/4" x 5" Basic White Cardstock panel inside. Then, placing them at different angles, I layered on a 3 1/2" x 4 1/2" Lemon Lime Twist panel, a 3 1/4" x 4 1/4" Melon Mambo panel, and a 3 1/4" x 4 1/4" Masterfully Made DSP panel.
The Masterfully Made DSP, along with several others, will be 15% off starting June 1st, in the DSP sale. Just in time for summer, hooray! If past experience holds true, there may be some sell-outs, so get your order in early! Here's the beautiful Masterfully Made DSP:
To create my Melon Mambo ribbon, I used the brush tip of my Melon Mambo (Dark) Stampin' Blends™ marker to colour a 6" length of White Glittered Organdy Ribbon. Tip: Place several layers of paper or a cardboard base under it, as alcohol markers readily bleed through paper. I set it aside to dry for a few minutes.
I fed the ribbon through the hole in the tag and tied a bow across the ribbon with White Twine from the Baker's Twine Essentials Pack. Then I used my Paper Snips scissors to trim the twine and ribbon.
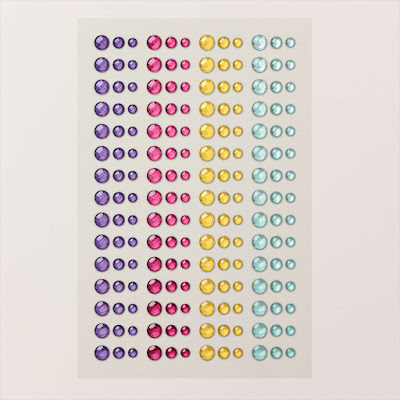
To finish the card, I layered on my tag, limes, and sentiment, popping up items as desired with Stampin' Dimensionals™. Then I embellished with Melon Mambo dots from the Glossy Dots Assortment. Its colours are perfect for summer:
Thanks for stopping by, friends! If you have questions about this project or any Stampin' Up!® products, I'm here to help.
Please check out my Special Offers below, and have a wonderfully crafty day!
🛍 Shop with me in May & receive FREE pieces to make this card!
Special Offers
Collect ALL the new colours - without breaking the bank!
Click here to sign up for Colour Club
No selling required. You don’t even have to buy anything else, ever!
Join our happy crafting community that stretches across the country, from southern Alberta to northern Labrador - and get 20% off future purchases!


No comments:
Post a Comment
How lovely of you to take the time to write a comment. Thank you - merci - woliwon!