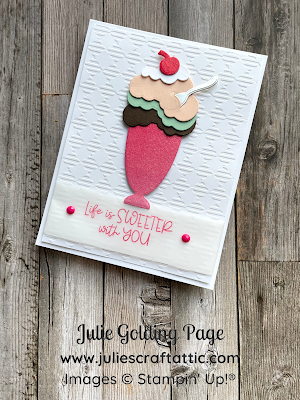
Friends, today we're back to our series featuring the Share a Milkshake Bundle. If you missed the previous cards, you can find them here and here. I'll include a clickable photo supply list for you at the end of this post.
Today's card highlights dry embossing on Basic White Cardstock as a background technique to make the card's colours pop:
Here are the instructions for making this card:
- Stamp sentiment in Sweet Sorbet Ink onto a 1 1/4” x 4” strip of Lovely Layers Vellum. Set aside to dry thoroughly.
- Using Share a Milkshake Dies, cut:
- Cherry and milkshake cup from 2022-2024 In Color Glimmer Paper
- Ice cream from Early Espresso, Mint Macaron & Petal Pink Cardstocks
- Whipped cream from Basic White Cardstock
- Spoon from Silver Foil Specialty Pack
- Using Gingham Embossing Folder, emboss a 4” x 5 1/4” Basic White Cardstock panel.
- Add Solid Faceted Gems to vellum strip.
- Attach vellum to embossed panel by applying Mini Glue Dots beneath embellishments.
- Layer pieces of milkshake onto each other and secure with favourite adhesive. Note: slip spoon into slit in the top layer of ice cream/froth.
- Attach completed milkshake to embossed panel with Stampin’ Dimensionals.
- Using Stampin’ Dimensionals, adhere completed panel to a 4 1/4” x 11” Basic White Thick Cardstock card base.
Special Offers
🛍 Shop with Me using Host Code YZFVA3SE & receive:
- FREE tutorial bundle featuring Playing in the Rain Bundle
- FREE card of the month
Here's a Sneak Peek from the Hues of Happiness Class:
No selling required. You don’t even have to buy anything else, ever!
💌 Thank you for stopping by, friends, and I wish you a wonderfully crafty day!
Product List


No comments:
Post a Comment
How lovely of you to take the time to write a comment. Thank you - merci - woliwon!