Friends, today I have a different kind of project for you. It's a tree ornament, in anticipation of the Christmas celebrations happening this weekend. The ornament features the Snowman Magic Bundle. I'll include a clickable photo supply list for you at the end of this post.
Here's how to construct the ornament:
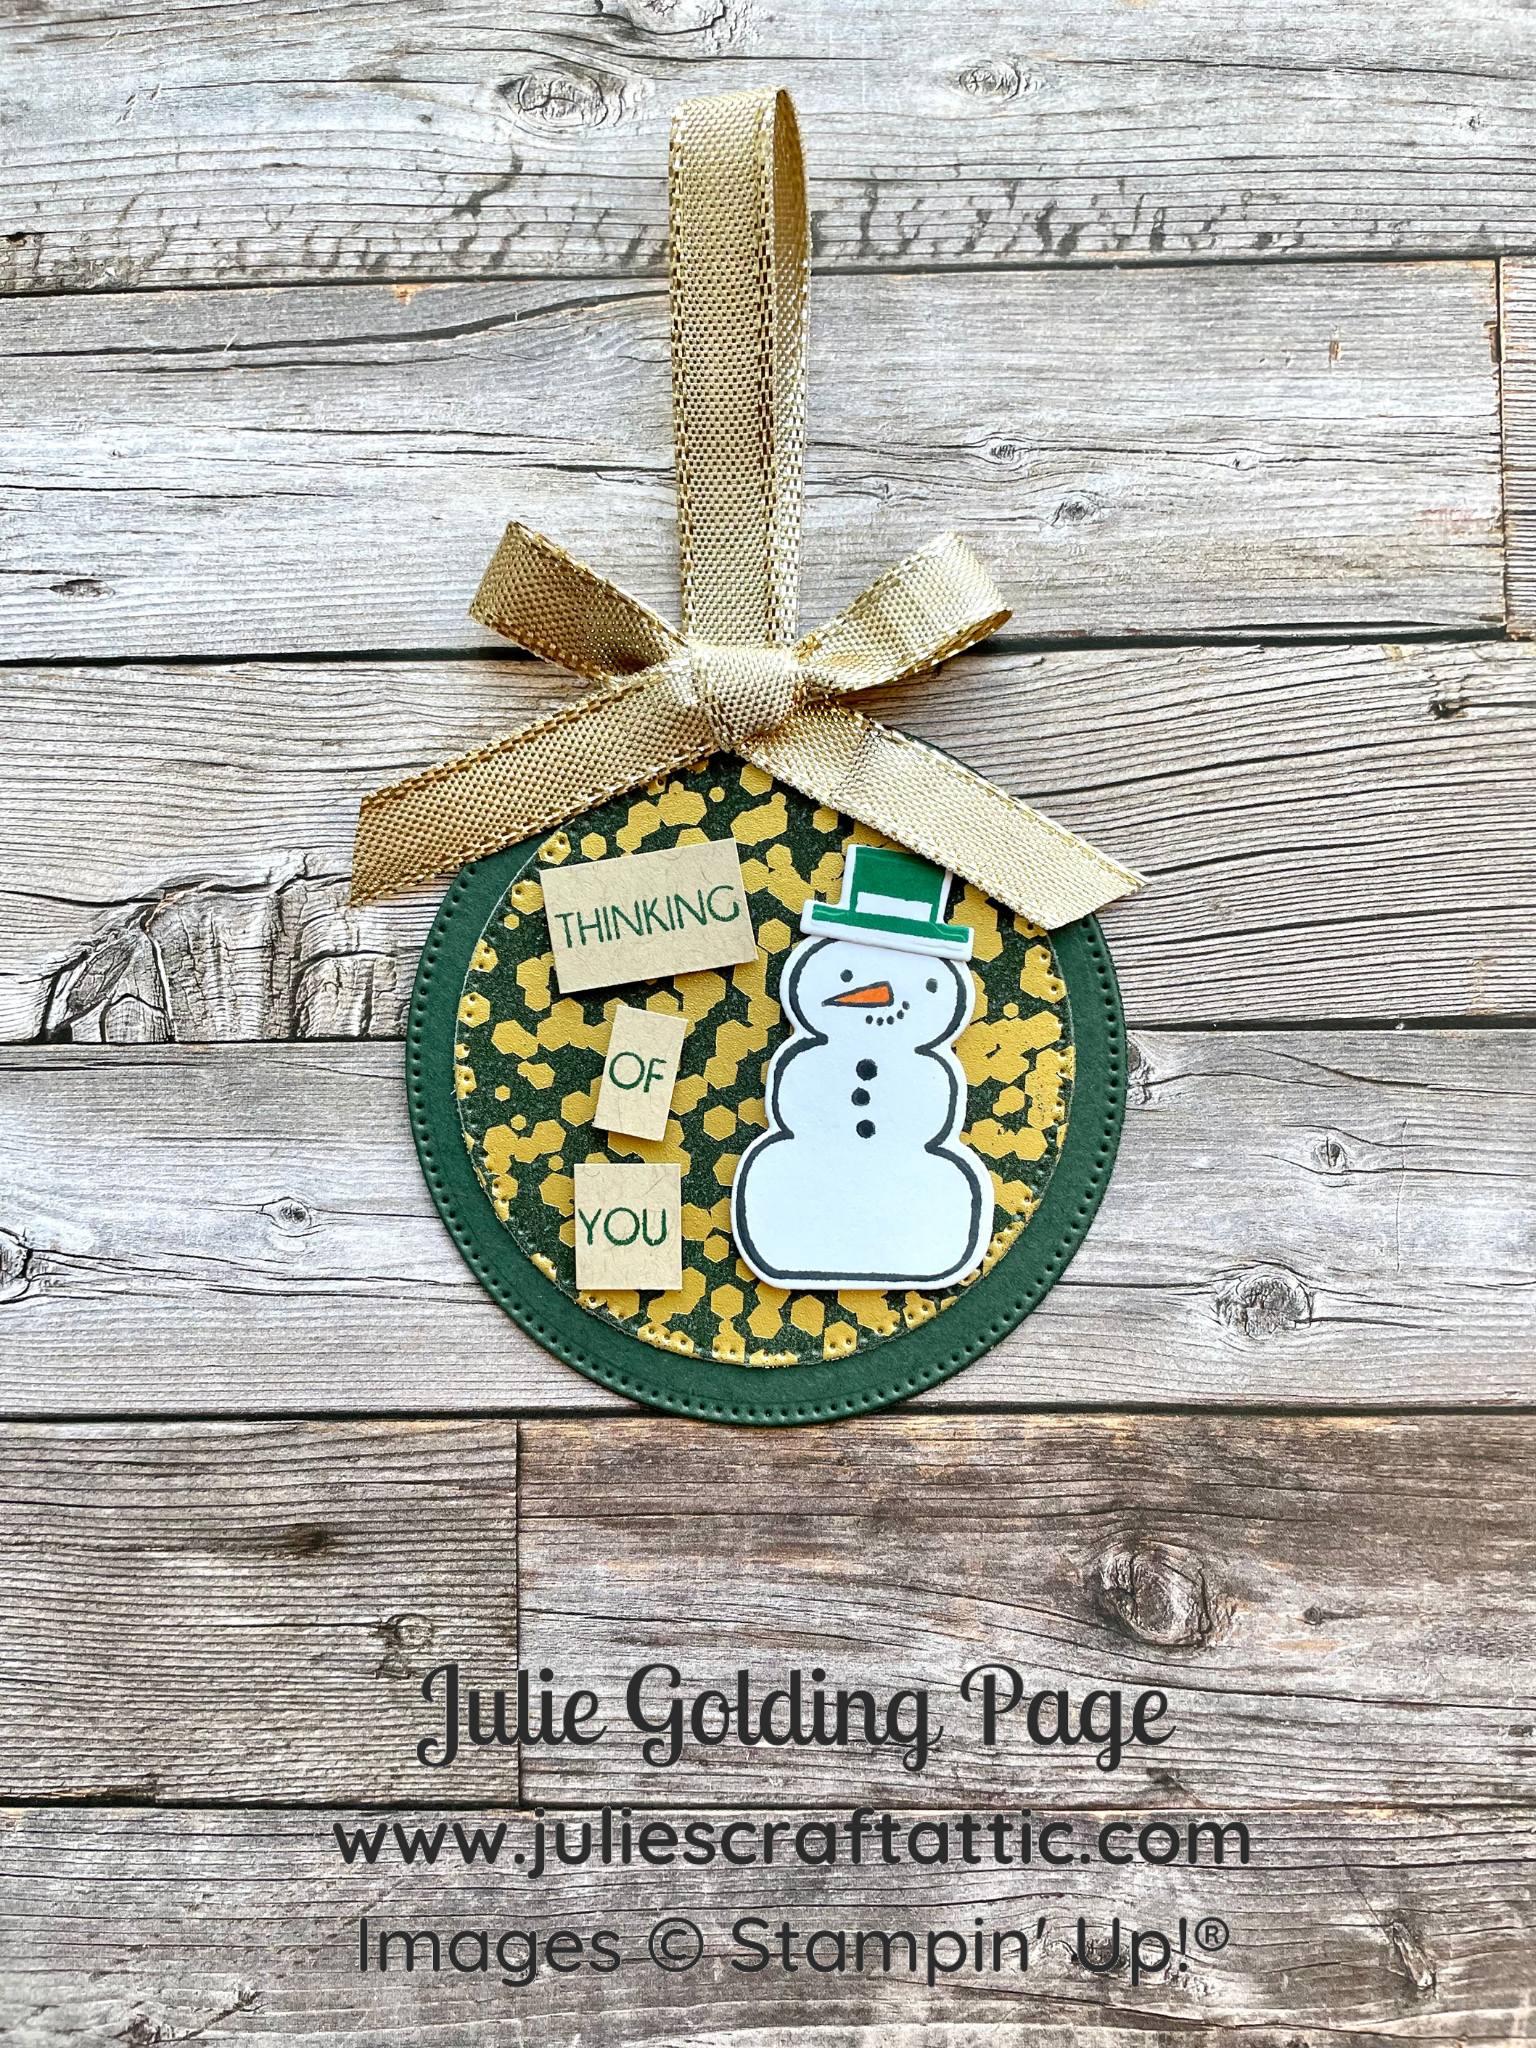
- Stamp sentiment in Shaded Spruce ink onto scraps of Crumb Cake Cardstock and cut words apart with scissors.
- Stamp snowman outline, buttons & face in Tuxedo Black Memento ink, and hat in Shaded Spruce ink, onto Basic White scraps.
- Colour carrot nose with Pumpkin Pie Stampin’ Blends.
- Die cut:
- One 2 1/2” Metallic & Shimmer circle using Stylish Shapes Dies
- Two 3” Evening Evergreen circles, using Stylish Shapes Dies
- Adhere Metallic & Shimmer circle to one Evening Evergreen circle.
- Cut a 6” and a 12” length of Gold Shimmer Ribbon.
- Fold 6” ribbon in half and adhere between the two Evening Evergreen Circles, creating a loop for hanging ornament.
- Tie a bow in 12” ribbon, trim as desired, and adhere to Metallic & Shimmer circle with Mini Glue Dots.
- Attach hat to snowman with Multipurpose Liquid Glue.
- Using Stampin’ Dimensionals, add snowman and sentiment words to ornament.
Special Offer
From December 22 thru 29, I'm offering a holiday special! Here are the details:

Join my newsletter today so you won't miss any future stamping deals and news!
And to see future projects, please follow my blog:

Thank you for stopping by, friends, and have a wonderfully crafty day!
")

 Shimmer Ribbon")
 Specialty Paper")


No comments:
Post a Comment
How lovely of you to take the time to write a comment. Thank you - merci - woliwon!