Friends, today I'm starting a holiday Fun Folds series, hooray! Hopefully these cards will give you ideas for your holiday crafting this fall.
All the cards feature the Ringed with Nature Stamp Set and Stylish Shapes Dies. I'll include a clickable photo supply list at the end of this post.
Here's my first card:
To make this card, I started by stamping a poinsettia onto a scrap of Basic White Cardstock in Poppy Parade Ink. I used Shaded Spruce Ink to add the centre, then to stamp a sentiment at the top of a 3 1/4" square of Basic White Cardstock.
- a small Basic White Cardstock circle with Stylish Shapes Dies
- 3 sprigs of greenery from Shaded Spruce Cardstock using Tree Rings Hybrid Embossing Folder (dies)
Next, I cut the pieces for the card:
- 4 1/4" x 11" card base from Poppy Parade Cardstock
- 2 1/4" x 4" piece for pocket from Poppy Parade Cardstock
- two 7/8" x 3 7/8" strips of Brights 6" x 6" DSP in Lemon Lime Twist for interior panels
- two 1 1/4" x 3 7/8" strips of Brights 6" x 6" DSP in Lemon Lime Twist for exterior panels
- one 1 3/4" x 3 1/4" strip of Brights 6" x 6" DSP in Lemon Lime Twist for pocket
- one 1 1/4" x 9" strip of Brights 6" x 6" DSP in Lemon Lime Twist for band
- four 1" x 3 7/8" strips of Brights 6" x 6" DSP in Poppy Parade - two for interior panels at edges of card and two for exterior panels
- two 1 1/4" x 3 7/8" strips of Brights 6" x 6" DSP in Poppy Parade for interior panels closest to middle of card
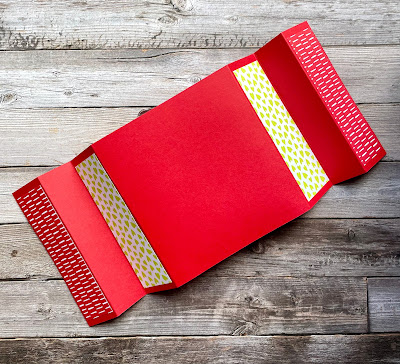
I cut out the poinsettia and layered it onto the Basic White Circle with the greenery die cuts. I closed the card, folding the flaps in so that the card formed a square (see photo at top of post).
Special Offers
Choose $165 worth of anything you want & pay just $135! No tax, no shipping in most provinces & territories.
No selling required. You don’t even have to buy anything else, ever!
Click Photo to Purchase in my Online Store:


.png)


No comments:
Post a Comment
How lovely of you to take the time to write a comment. Thank you - merci - woliwon!