Friends, it's a beautiful day here in Saint Stephen, New Brunswick, Canada, along the tidal Skutik (St Croix) River. And so I am thinking about the flowers that are soon to come with the warmer weather.
Today I have a card for you starring the new Cheerful Daisies Bundle - and Blending Brushes!
I'll include a clickable photo supply list at the end of this post. Just click on the item to see it in my online store.
To make this card, I started by die cutting the longest label from the Stylish Shapes Dies out of Crumb Cake Cardstock. Then I used my Paper Trimmer to cut the right edge off the label.
I stamped my sentiment from the Cheerful Daisies Stamp Set onto the right side of the label in Pretty Peacock Ink. I find this blue-green is such an appealing colour, and its deep hue is perfect for stamping sentiments.
Next, I cut a 3 1/2" x 5 1/4" panel of Naturally Gilded Specialty DSP. This lovely specialty DSP was released this spring as an Online Exclusive. It includes papers in Basic White and Very Vanilla, with gold, silver, and copper foil accents. I used the Very Vanilla paper with gold flowers.
Using Blending Brushes in a circular motion, I added Lost Lagoon Ink to the bottom third of my panel and Moody Mauve Ink to the rest of the panel, blending them together in the middle.
I adhered the panel to a 4" x 5 1/4" Moody Mauve Cardstock panel.
To make the daisies, I used my Mini Stampin' Cut & Emboss Machine to cut: 2 daisy outlines from Crushed Curry Cardstock, 2 stems and 2 flower centres from Early Espresso Cardstock, and 2 golden floral details from Gold Foil Sheets.
Here's a look at the full Cheerful Daisies Bundle:
After piecing together the daisies, I attached the stamped label to the right side of the blended panel with Stampin' Dimensionals™. I then added the daisies, overlapping them and securing with Stampin' Dimensionals™.
With gold Simply Elegant Trim, I tied the daisy stems together and created a bow. Then I adhered the panels to my 4 1/4" x 11" Crumb Cake Cardstock card base with Stampin' Dimensionals™.
My final step was to embellish with 2023-2025 In Color™ Dots.
To celebrate my 2nd Stampiversary as a demonstrator and my 29th wedding anniversary, I'm holding a special Anniversary Promo thru Friday 12 May. Receive a FREE simple stamping card class containing the supplies for 3 cards when you do any of the following:
- Place an order for current product using host code 3J3KUUDT
- Sign up for an Online Class - NEW classes just posted!
- Register for a Colour Club
Thanks so much for stopping by and celebrating with me, friends!
Check out my Special Offers below - I'd love to have you become part of our cross-Canada crafting community!
Special Offers
🎁 Shop with me thru 12 May & receive a FREE card class!
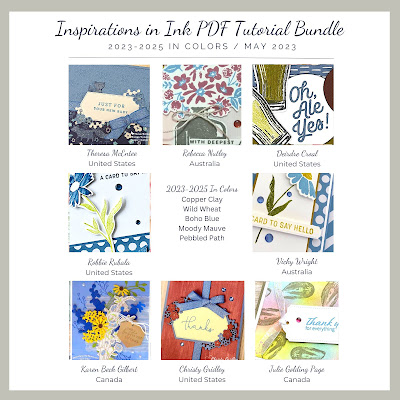
🎁 Shop with me & receive a FREE tutorial bundle featuring the 5 New In Colors™!

Collect ALL the new colours - without breaking the bank!
Click here to sign up for Colour Club
No selling required. You don’t even have to buy anything else, ever!
Join our happy crafting community that stretches across the country, from southern Alberta to northern Labrador - and get 20% off future purchases!


No comments:
Post a Comment
How lovely of you to take the time to write a comment. Thank you - merci - woliwon!