Happy New Annual Catalogue Day, friends!
Today I've got a special demo for you, with a walk-through of the new catalogue. There are samples, peeks at many new products, and a special project featuring all new colours, plus the DSP and stamp & die bundle from the Bright & Beautiful Suite.
To make this card, I started by using the brush tip of Azure Afternoon Stampin' Blends™ (dark) to colour a small length of Gold & Vanilla Satin Edged Ribbon. I then set it aside to dry well. Tip: place a piece of cardstock or several layers of paper underneath, as the alcohol markers will bleed through.
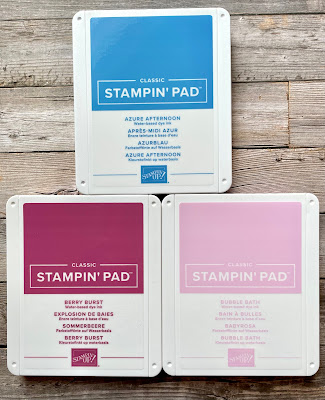
Next, I did my stamping with the brand new Beautiful Balloons Stamp Set. I stamped the large balloon in Bubble Bath ink, and the two smaller balloons in Azure Afternoon and Berry Burst inks. I also stamped the sentiment in Azure Afternoon, right onto the Bubble Bath balloon.
I love these three new Core Colours - and they go beautifully together!
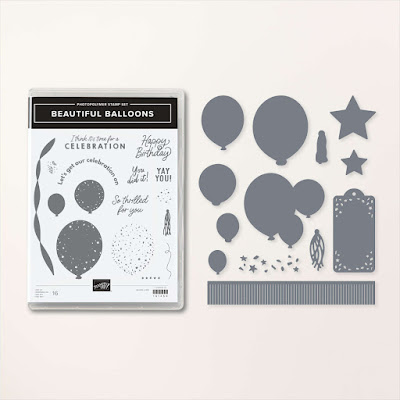
I used the Beautiful Balloons Dies to cut out the balloons. Here's a look at the new Beautiful Balloons Bundle, just in time for birthdays, graduations, and other summer celebrations:
To create the balloon strings, I added Simply Elegant Twine (Gold) to the backs of the balloons, securing under a Stampin' Dimensional™. I layered the balloons on with Stampin' Dimensionals™ as well. Simply Elegant Trim is very versatile, as it comes with a skein each of Gold and Silver:
I used the coloured Azure Afternoon ribbon to make a knot around the balloon strings and trimmed it. Then I added the card panel to a 5 1/2" x 8 1/2" Basic White Thick Cardstock card base with Stampin' Dimensionals™. I embellished with Classic Matte Dots.
Thanks for stopping by, friends. I hope you enjoyed exploring the brand new Bright & Beautiful Suite with me, found on pages 14-15 of the new Annual Catalogue.
Check out my Special Offers below - I'd love to have you shop with me & become part of our cross-Canada crafting community!
Special Offers
Collect ALL the new colours - without breaking the bank! Deadline extended to May 3!
Click here to sign up for Colour Club
No selling required. You don’t even have to buy anything else, ever!
Join our happy crafting community that stretches across the country, from southern Alberta to northern Labrador - and get 20% off future purchases!


No comments:
Post a Comment
How lovely of you to take the time to write a comment. Thank you - merci - woliwon!