Happy Spring, friends!
I live in Saint Stephen, New Brunswick, Canada - just across the tidal Skutik (St Croix) River from Calais, Maine, USA. This beautiful area is just off the Bay of Fundy, home of the world's highest tides. It's the traditional territory and home of the Passamaquoddy, and I'm grateful they share it with us.
Thanks for joining us on our blog hop across the Stampin' Up!® world. Contributors are all members of the fantastic Demonstrator Training Program organized by Kylie & Bruno Bertucci. A big shout out to Kylie & Bruno in Australia!

We've created these cards to say thank you to our lovely customers. Just click on the Blog Hop Links at the end of this post to see more cards.
My April card highlights many soon-to-retire items from the Last Chance Sale. I'll include a clickable photo supply list for you at the end of this post.
My colour palette includes Crumb Cake, Early Espresso & retiring colour Blushing Bride. Get your inks, cardstock, and other items in this colour before May 2nd, when they'll retire!
To make this card, I started with die cutting. With Painted Labels Dies (retiring), I cut a decorative circle from Early Espresso Cardstock. Then I used Teacup Dies (retiring) to cut a solid teacup from Crumb Cake and a teacup outline from Blushing Bride, adhering them together with Multipurpose Liquid Glue.
Next, I arranged a 3 3/4" x 3" panel of Abigail Rose DSP (retiring) on a 4" x 5 1/4" Blushing Bride Cardstock panel, to see where to stamp my sentiment. I stamped the sentiment from the Cup of Tea Stamp Set (retiring) in Early Espresso Ink. Then I adhered the DSP panel.
To assemble, I attached a 1" x 4 1/4" and a 1" x 4 1/2" strip of Abigail Rose DSP to the DSP panel, with one overlapping the other. (I cut chevrons in one end of them before adhering.) Then I wrapped a length of Natural Finish Ribbon (retiring) around the Blushing Bride panel to hide the DSP seam, securing on the back with Mini Glue Dots.
I adhered the teacup to the decorative circle. Using Stampin' Dimensionals, I added the circle to the panel & the panel to a 4 1/4" x 11" Crumb Cake Cardstock card base. Finishing touches were attaching a bow made from Early Espresso Faux Suede Trim (retiring) and embellishing with Pastel Pearls (retiring).
Don't miss all these terrific retiring items and lots more in the Last Chance Sale, on thru May 1st. Discounts are up to 60%! But don't wait - when they're gone, they won't be re-stocked.
Thanks for stopping by! If you're in Canada and don't already have a demonstrator, I'd love to assist with your order. Do check out my Special Offers below, including a FREE card class by mail offer that ends today!
Blog Hop Links
Special Offers
🎁 Want a FREE Card Class?
Receive a FREE 3-card class by mail when you:
- Shop with me using Host Code UYR4BQM7
- deadline EXTENDED thru the holiday weekend to April 10!
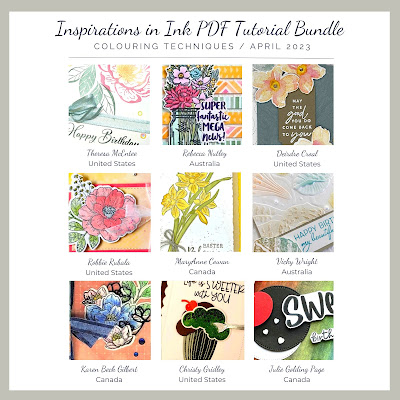
- FREE tutorial bundle featuring Colouring Techniques
- FREE card of the month
No selling required. You don’t even have to buy anything else, ever!
Join our happy crafting community that stretches across the country, from southern Alberta to northern Labrador!
Find out more here
Receive FREE pre-cut paper pieces for a card as my thanks! (Canadian addresses only)
💻 Follow my blog:
Click the button below so you won't miss a single card!

Product List


Beautiful card!!! I absolutely LOVE that color combination <3
ReplyDeleteI agree with Samantha. . . beautiful card and great colour combination. Thank you Julie for taking part in our Demonstrator Training Blog Hop this month.
ReplyDelete