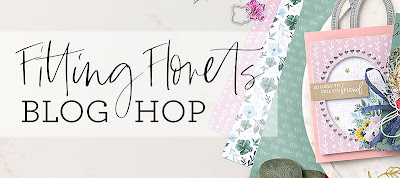
First, a much deserved thank you to Kylie & Bruno Bertucci (Australia), who organized this fantastic blog hop as part of their equally fabulous Demonstrator Training Program. My product wasn't due to arrive until after the blog hop launched, and I'm grateful they graciously allowed me to step in late. You guys are awesome! 💕
My Fitting Florets items arrived today, so this card is hot off the presses:
My card features the terrific decorative ovals from the Framed Florets Dies plus the Fitting Florets DSP. These and other products used are shown in a photo list at the end of this post. Clicking each item's photo will take you to the product in my online store.
I chose a colour palette that *could* suggest Christmas - but it doesn't have to. I drew Evening Evergreen, Soft Succulent, and Basic White directly from the DSP and simply added Cherry Cobbler for additional warmth.
My first step was to use the oval dies to cut out pieces in Cherry Cobbler, Soft Succulent, and Basic White Cardstock, as well as two identical pieces of greenery in Soft Succulent and Basic White. Then I stamped a sentiment in Evening Evergreen from the super-versatile Decorated with Happiness stamp set. As with the colour scheme, I wanted to choose a sentiment that could be appropriate for everyone, whether they celebrate Christmas, other seasonal holidays, or not.
Next I adhered a 3 3/4" x 5" DSP panel to a 4" x 5 1/4" Cherry Cobbler Cardstock panel, then used dimensionals to attach the panels to a 4 1/4" x 11" Thick White card base. I added the Cherry Cobbler and stamped ovals, then popped up the Soft Succulent oval with Mini Dimensionals. Then I tied a bow in Evening Evergreen 3/8" Windowpane Check Ribbon and added it to the card front with a Mini Glue Dot. After overlapping and adhering the two pieces of greenery together for added stability, I tucked them under the ribbon and attached them to the card front. The final step was to add Festive Pearls to bring out the Cherry Cobbler elements.
Or why not join my Creative Cafe group? You'll receive $30+ of FREE products just for signing up, plus the chance to participate in a $10/month card class and a minimum 20% discount on future orders throughout your membership! There's no obligation to sell (or even buy) anything ever again.
For even more card inspiration, please follow my blog:
And please stay in touch by signing up for my e-newsletter here.
Thanks for stopping by, friends, and have a wonderfully crafty day!
Blog Hop Links:
Product List
.png)


What a beautiful card, Julie! ~ Kim Kroeker
ReplyDelete